EVK Setup with the Start Wizard
Note
For Host Mode S/W Package Versions up to v1.2.1, please follow the instructions on the page Start Wizard & SWiSS on Older EVKs.
Overview
In this tutorial, we will set up one EVK as an access point (AP) and another EVK as a station (STA) using the Start Wizard.
Requirements
The tool requires Java Runtime Environment (JRE8). Download and install the OS-compatible version of JRE8 for the PC.
Download Link
Launching the Program
Attach the antennas to the EVKs and turn them on by supplying power through the USB-C port on the Raspberry Pi 4.
Plug a USB-Ethernet adapter into the PC.
Use a LAN cable to connect the USB-Ethernet adapter and one of the EVKs.
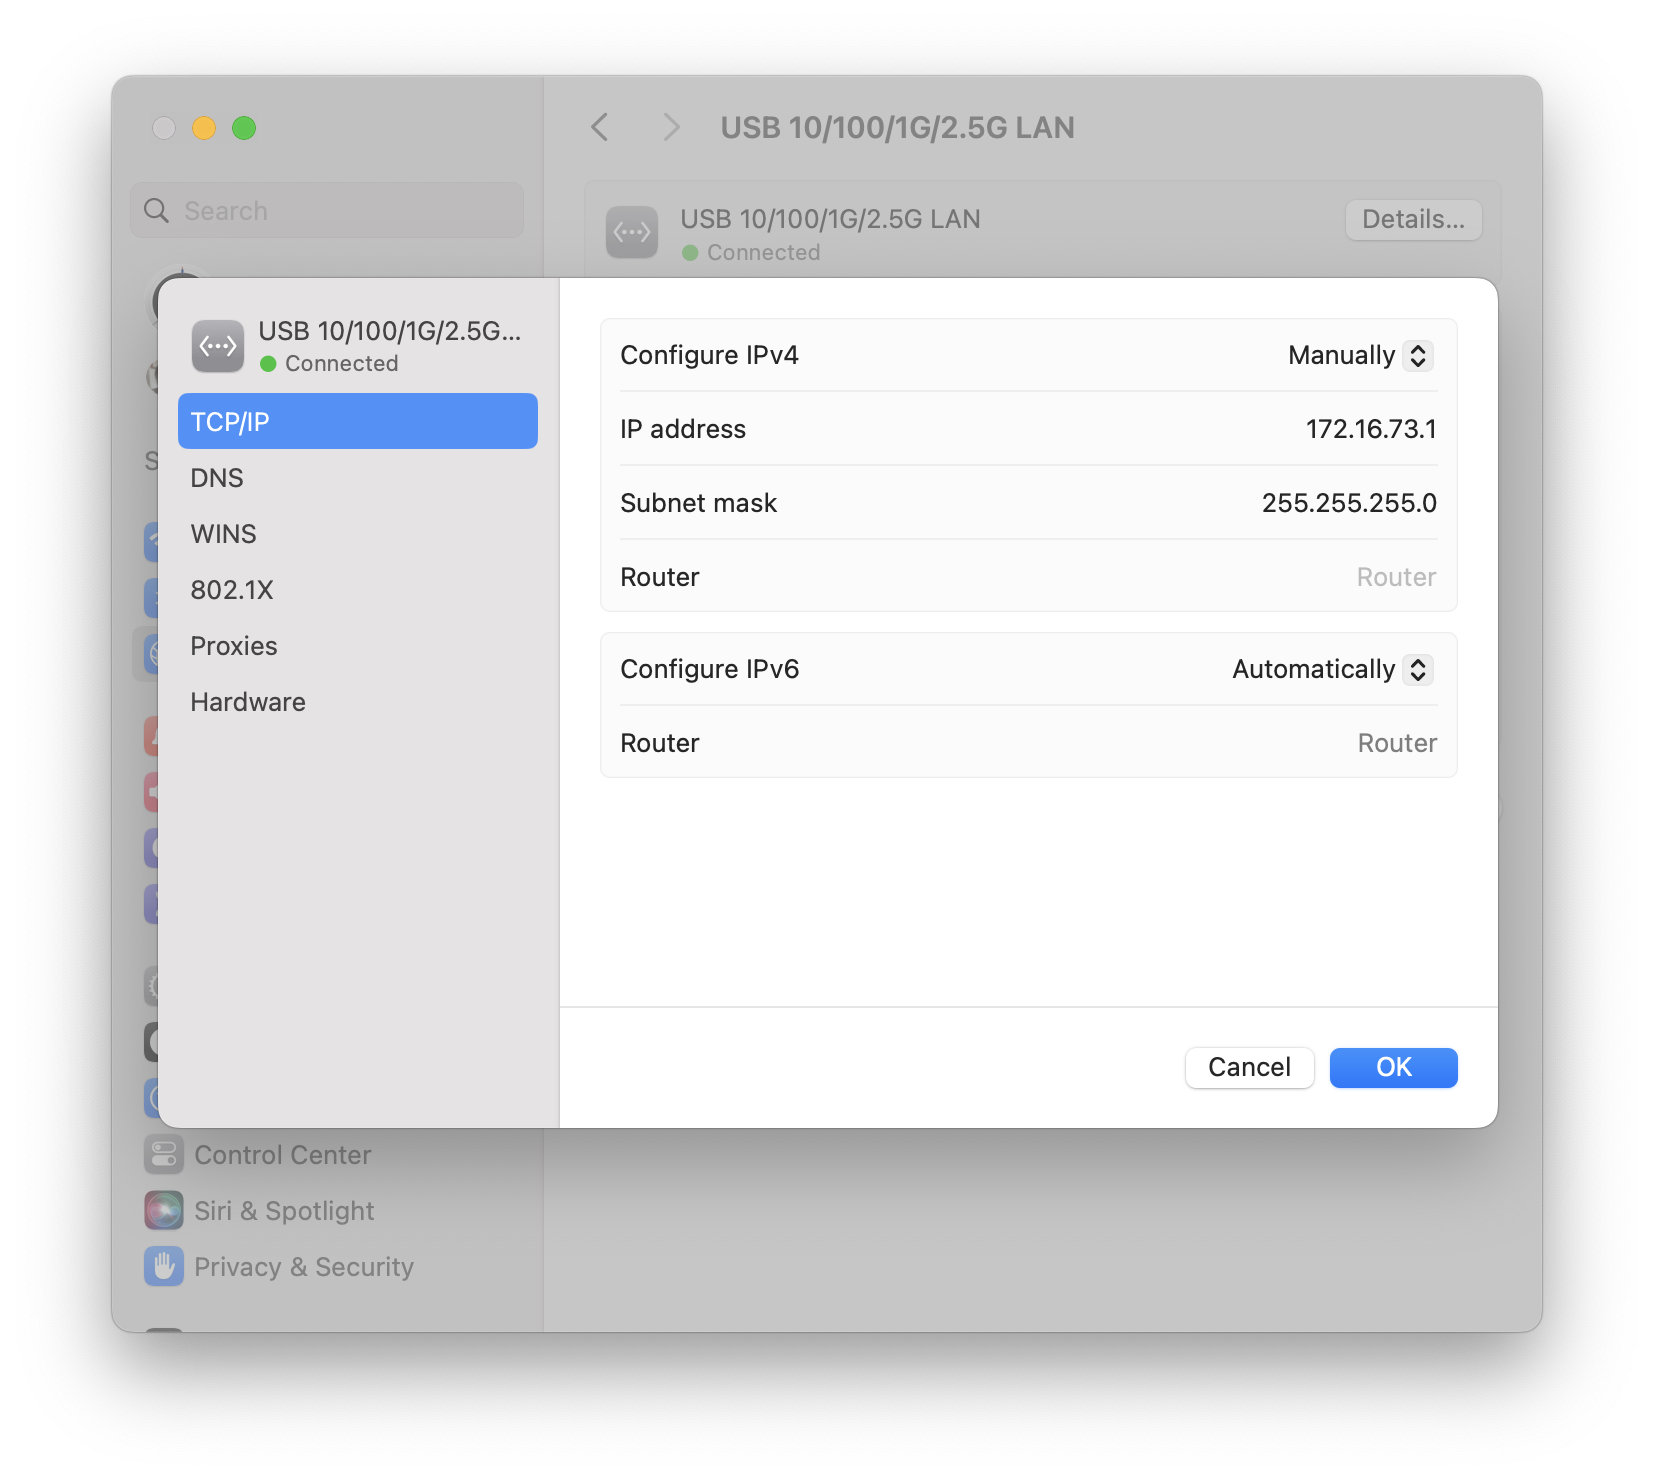
Set the following IPv4 configuration for the Ethernet adapter interface on the PC side:
IP: 172.16.73.1 / Netmask: 255.255.255.0
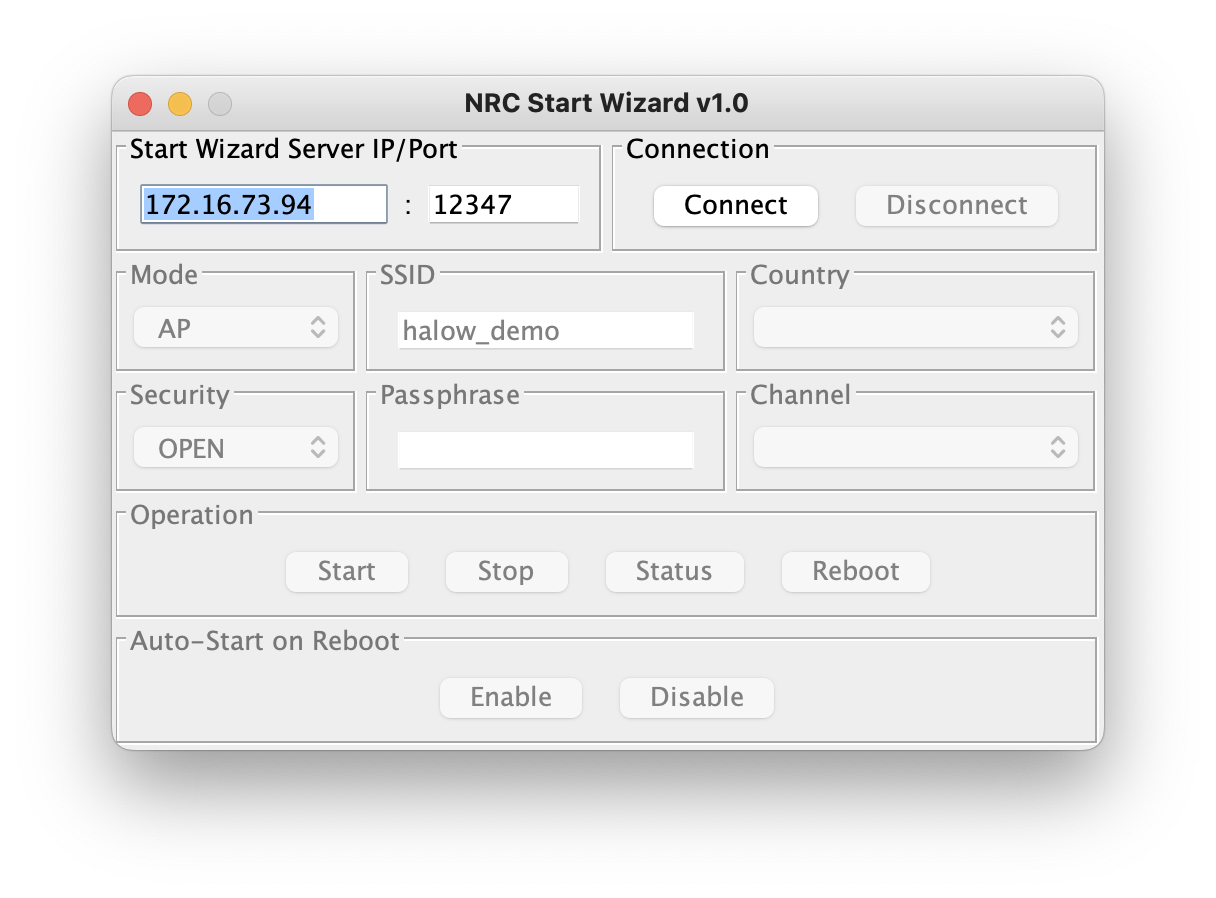
Launch the Start Wizard application.
- Windows:
Double-click ‘nrc_start_wizard.exe’.
- MacOS:
Right-click ‘nrc_start_wizard.jar’ and select OPEN.
- Linux:
Navigate to the program directory and type ‘./run’.
Press CONNECT. This will unlock the parameter control panel.
Warning
Wait for 30 seconds before pressing CONNECT if the EVK is just powered on.
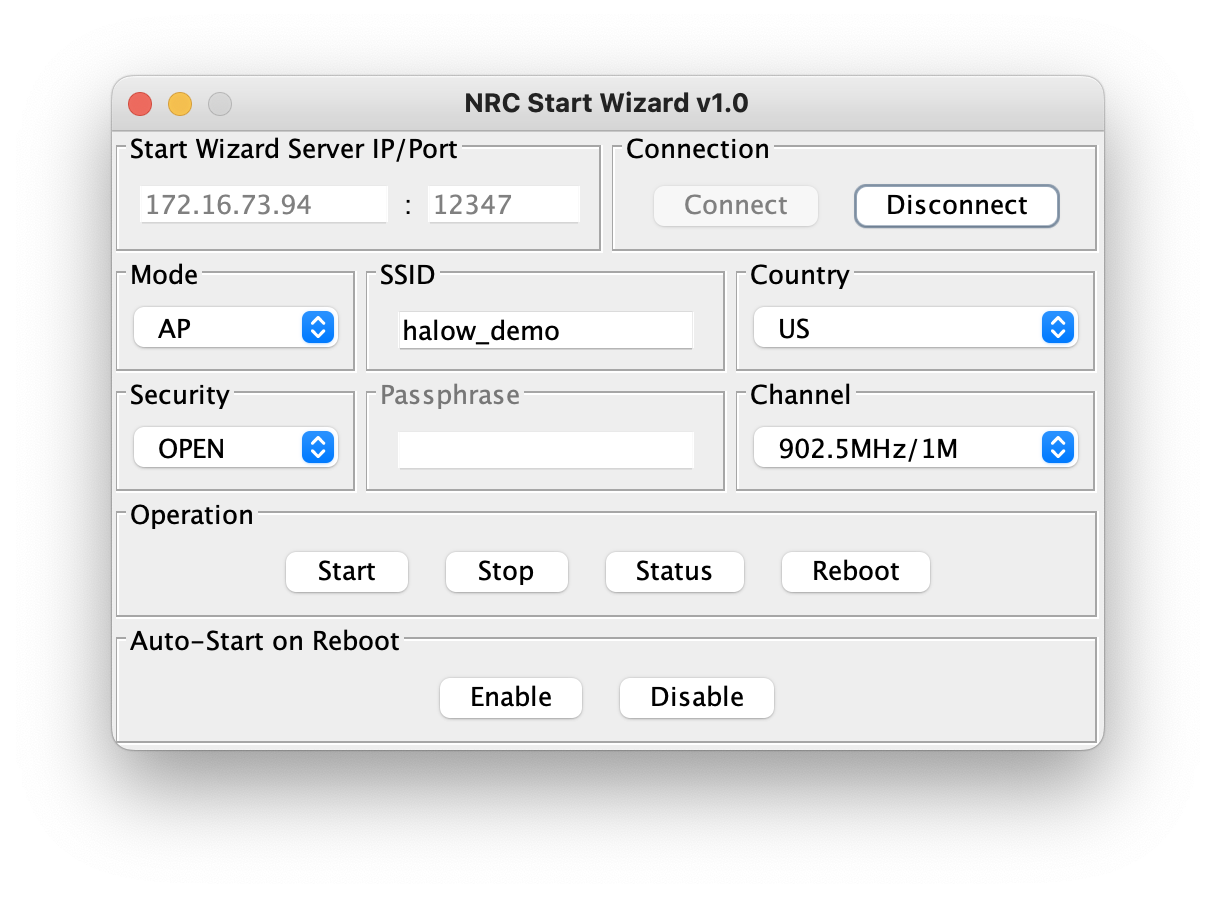
Set the Mode to AP and configure the following settings as needed:
SSID
Country
Security
Passphrase
Channel
To run the AP operation automatically on reboot, press ENABLE under Auto-Start on Reboot. Pressing DISABLE will clear any existing auto-start setup applied through the Wizard application on the EVK.
Press START to apply the settings.
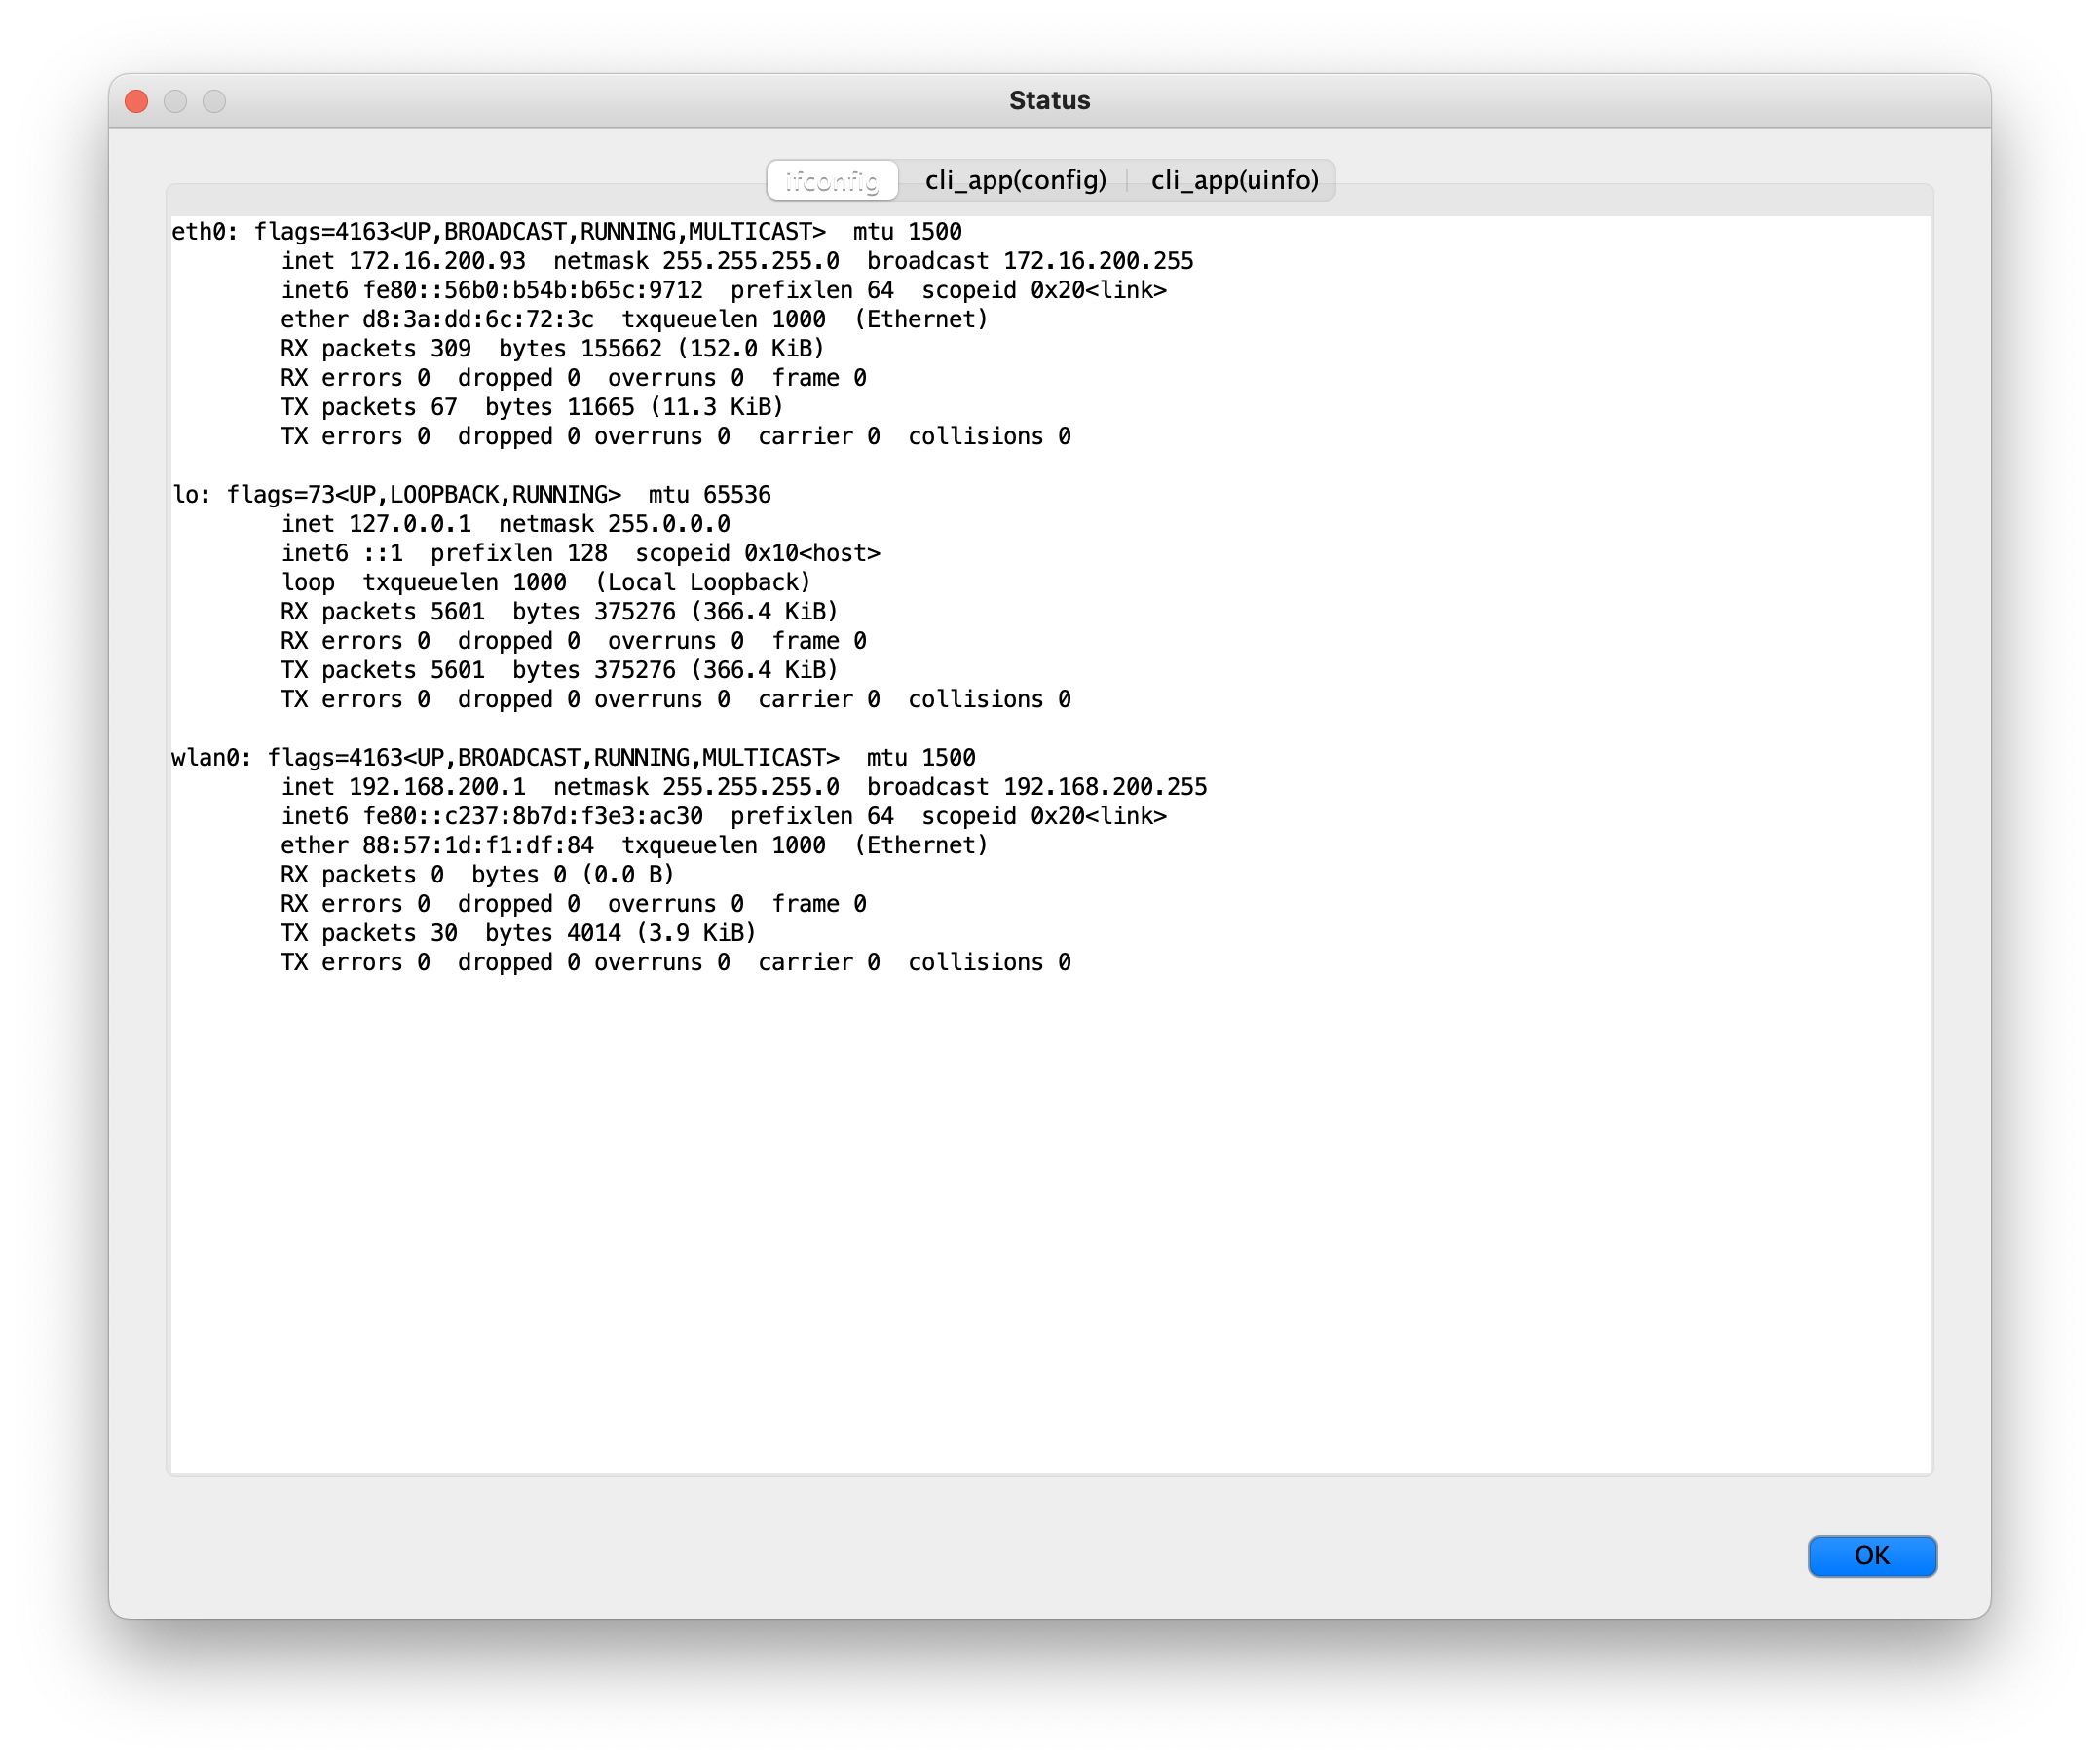
Wait for 20 seconds and press STATUS to ensure the AP is running by verifying that the IP 192.168.200.1 is assigned to the wlan0 interface on the ifconfig page.
Press DISCONNECT.
Unplug the LAN cable from the AP and plug it into the other EVK.
Press CONNECT again to unlock the parameter control panel.
Set the Mode to STA and configure the following settings as needed:
SSID
Country
Security
Passphrase
To run the STA operation automatically on reboot, check the Auto-Start box.
Press START to apply the setting.
Wait for 20 seconds and press STATUS to ensure the STA is running by verifying that the IP 192.168.200.X (X can be any number) is assigned to the wlan0 interface on the ifconfig page.
Note
For optimal performance, the EVKs should be placed at least 10 feet apart from each other. Consider using an attenuator if they need to be placed closer to each other.